OUTDOOR STYLE
ALFRESCO
ESSENTIALS
TRY YOUR HAND AT THESE
DIY GLAMPING PROJECTS
Tools & materials
nS
� afety equipment (mask,
ear and eye protection)
n �Tape measure and pencil
n �Circular saw with
straightedge
n �Framing square
n �Drill with 3mm, 2mm, 6mm
countersinking and driver bits
n �Screwdriver
n �Quick-grip clamps
n �Cloths
n �Combination pliers
n �Five 1220mm x 610mm
x 12mm plywood sheets•
n 1� 80-grit abrasive paper
with sanding block
nM
� asking tape
nE
� xterior adhesive
n8
� G x 25mm
countersunk screws
n �Danish oil
n �Four 90mm x 60mm
loose-pin butt hinges
n �8G x 12mm and 15mm
pan head screws
n �1.8mm clock chain
n �Four 7mm screw eye hooks
n �224mm cabinet handle
n �Two 160mm grab handles
n �Magnetic cupboard catch
n �Sash fastener
CUTTING LIST
On five sheets of 1220mm x 610mm x 12mm marine-grade
plywood, cut a 600mm x 600mm back, two 600mm x 512mm
sides, three 600mm x 500mm shelves for top, base and middle,
and a 600mm x 50mm shelf lip. Mark a 624mm x 524mm lid,
624mm x 455mm front and 624mm x 120mm lid lip.
On the offcuts, mark 500mm width for a 300mm base divider,
two 100mm middle shelf dividers and a 294mm short shelf. Cut
two 200mm x 50mm packers. Label all pieces with masking tape.
Cut from large to small using a circular saw with a straightedge.
Smooth the cuts with 180-grit abrasive paper to remove breakout.
20 bunnings.com.au |
bunnings |
bunnings
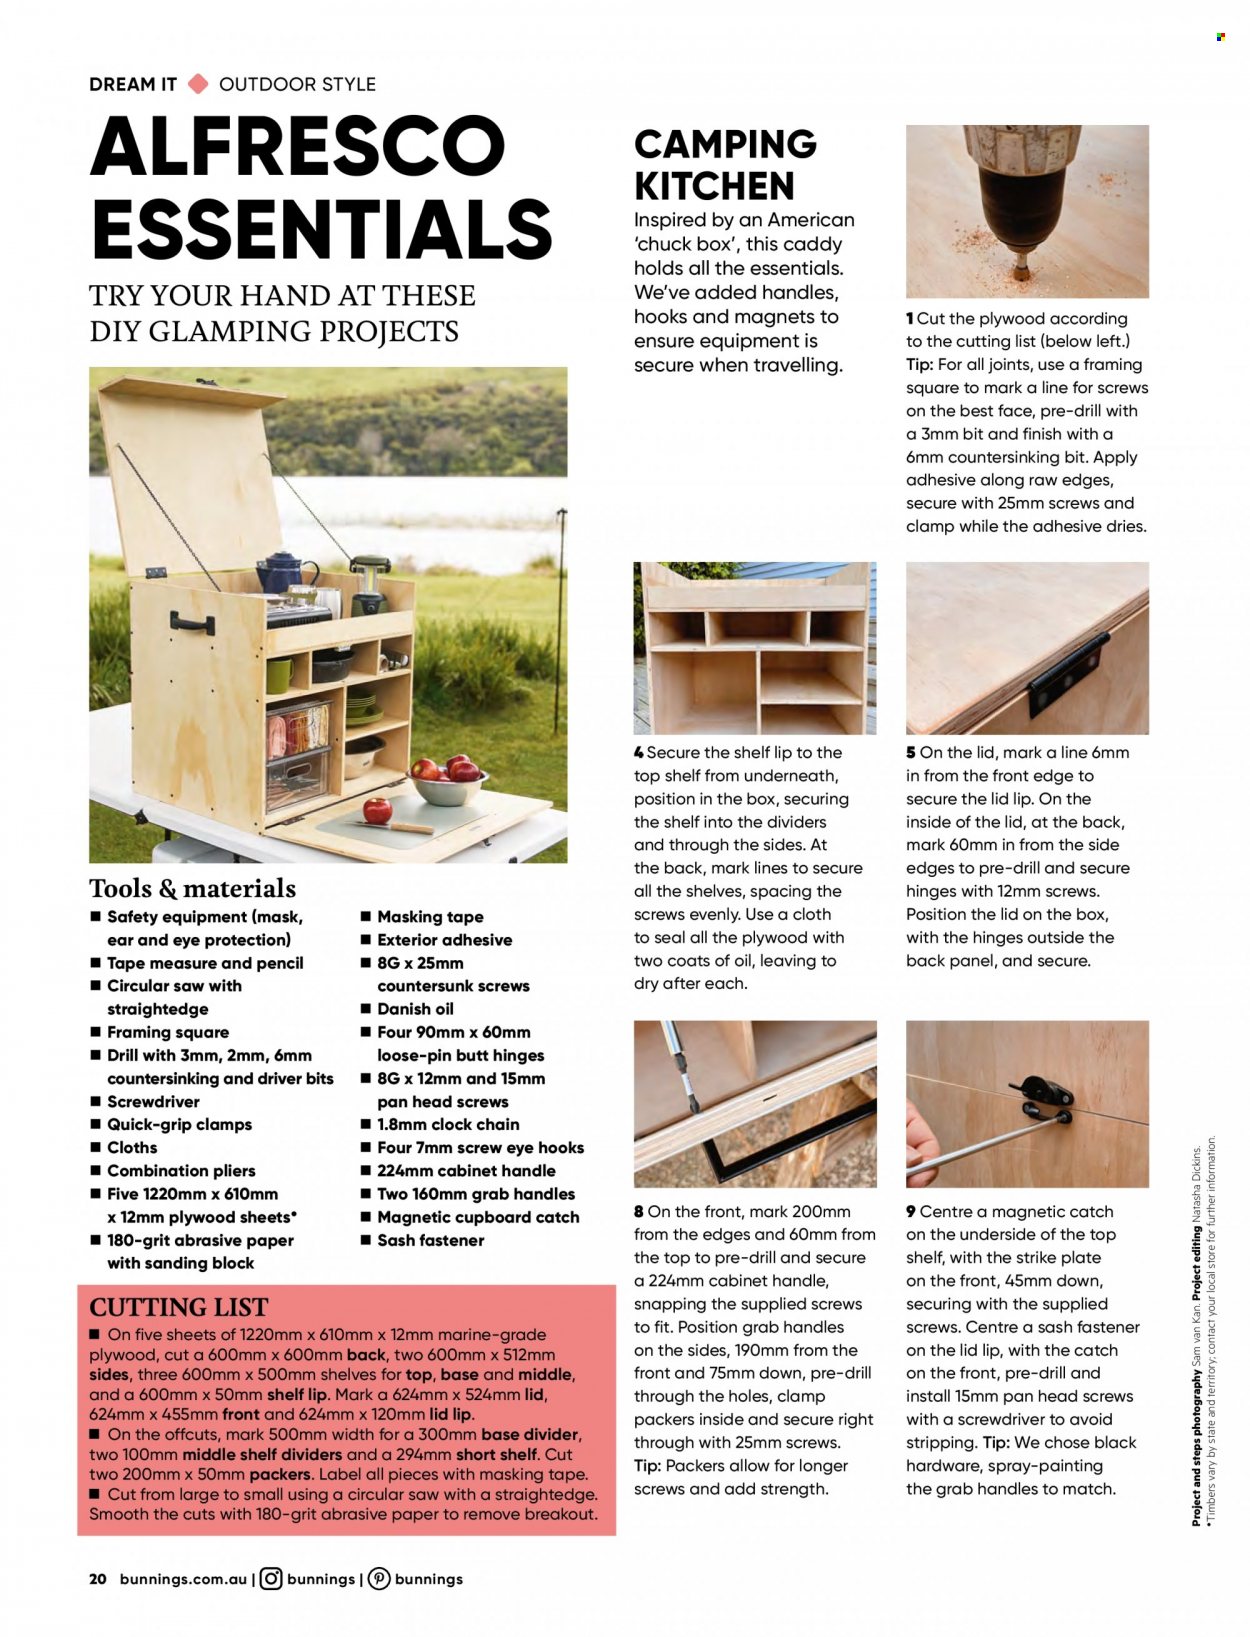
CAMPING
KITCHEN
Inspired by an American
‘chuck box’, this caddy
holds all the essentials.
We’ve added handles,
hooks and magnets to
ensure equipment is
secure when travelling.
1 Cut the plywood according
to the cutting list (below left.)
Tip: For all joints, use a framing
square to mark a line for screws
on the best face, pre-drill with
a 3mm bit and finish with a
6mm countersinking bit. Apply
adhesive along raw edges,
secure with 25mm screws and
clamp while the adhesive dries.
4 Secure the shelf lip to the
top shelf from underneath,
position in the box, securing
the shelf into the dividers
and through the sides. At
the back, mark lines to secure
all the shelves, spacing the
screws evenly. Use a cloth
to seal all the plywood with
two coats of oil, leaving to
dry after each.
5 On the lid, mark a line 6mm
in from the front edge to
secure the lid lip. On the
inside of the lid, at the back,
mark 60mm in from the side
edges to pre-drill and secure
hinges with 12mm screws.
Position the lid on the box,
with the hinges outside the
back panel, and secure.
8 On the front, mark 200mm
from the edges and 60mm from
the top to pre-drill and secure
a 224mm cabinet handle,
snapping the supplied screws
to fit. Position grab handles
on the sides, 190mm from the
front and 75mm down, pre-drill
through the holes, clamp
packers inside and secure right
through with 25mm screws.
Tip: Packers allow for longer
screws and add strength.
9 Centre a magnetic catch
on the underside of the top
shelf, with the strike plate
on the front, 45mm down,
securing with the supplied
screws. Centre a sash fastener
on the lid lip, with the catch
on the front, pre-drill and
install 15mm pan head screws
with a screwdriver to avoid
stripping. Tip: We chose black
hardware, spray-painting
the grab handles to match.
Project and steps photography Sam van Kan. Project editing Natasha Dickins.
•Timbers vary by state and territory; contact your local store for further information.
DREAM IT