TOOLS & MATERIALS
Make a unit narrower
DIY TOOLKIT
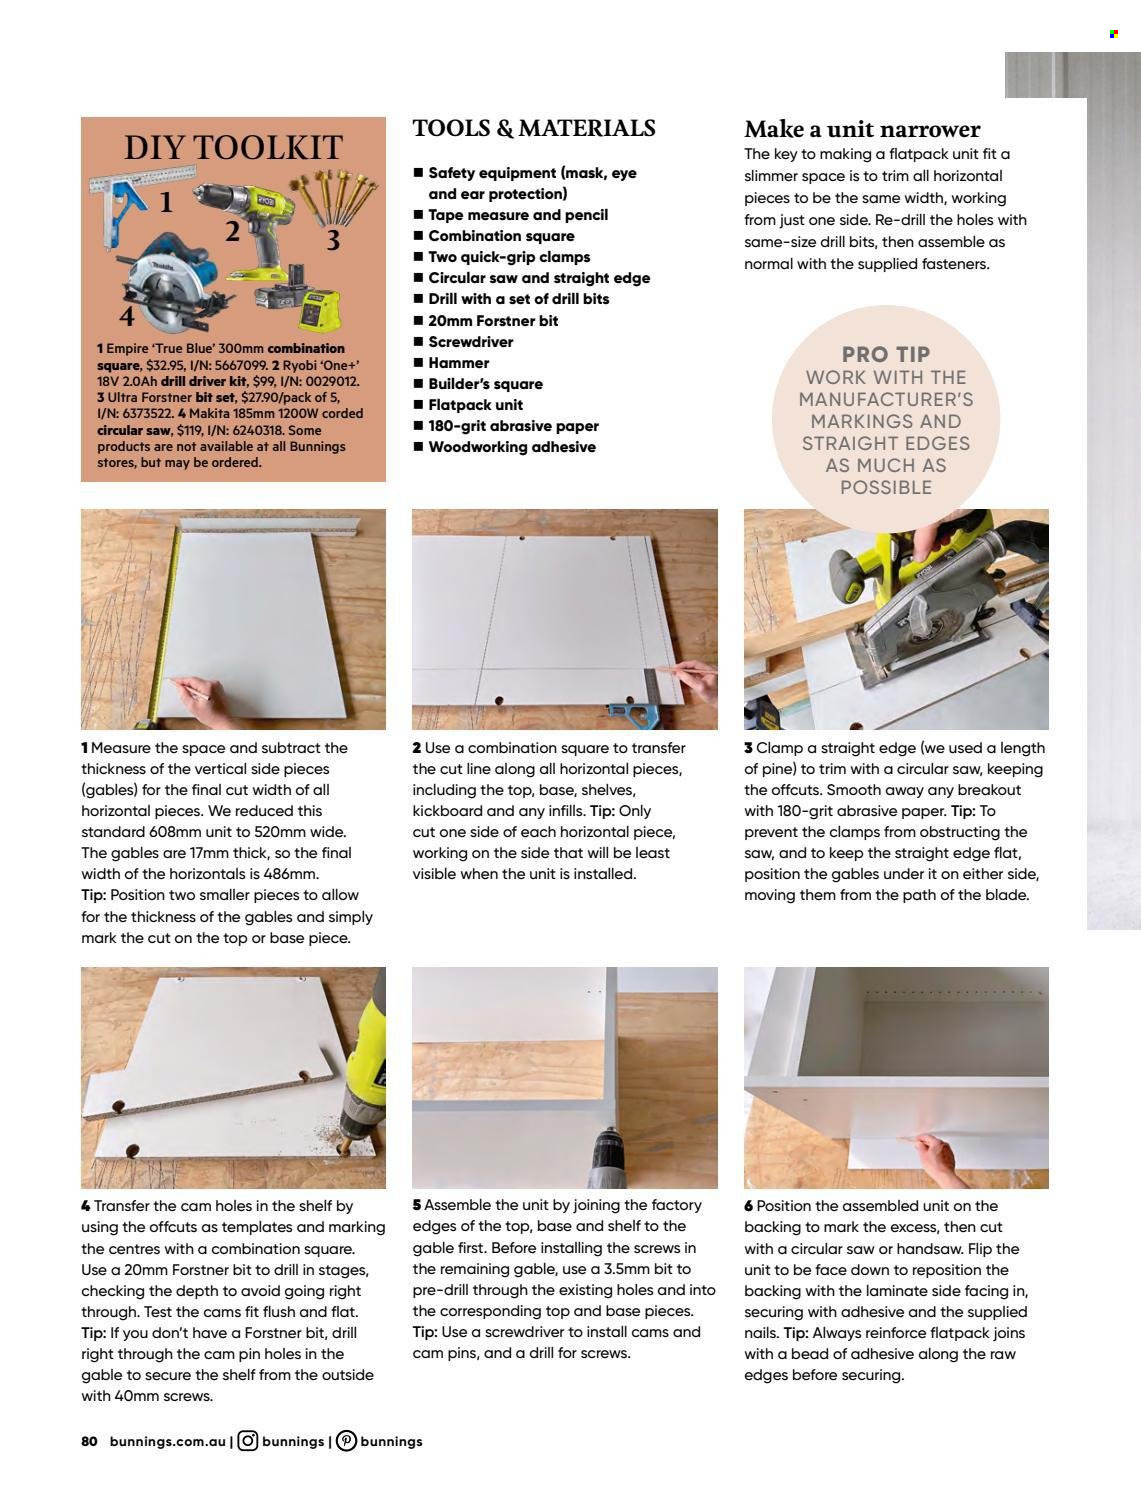
The key to making a flatpack unit fit a
1 Safety equipment (mask, eye
and ear protection)
I Tape measure and pencil
1 Combination square
I Two quick-grip clamps
I Circular saw and straight edge
I Drill with a set of drill bits
slimmer space is to trim all horizontal
pieces to be the same width, working
from just one side. Re-drill the holes with
same-size drill bits, then assemble as
normal with the supplied fasteners.
1 Empire True Blue' 300mm combination
square, $32.95, I/N: 5667099. 2 Ryobi 'One+
18V 2.0Ah drill driver kit, $99, I/N: 0029012.
3 Ultra Forstner bit set, $27.90/pack of 5,
I/N: 6373522. 4 Makita 185mm 1200W corded
circular saw, $119, 1/N: 6240318. Some
products are not available at all Bunnings
stores, but may be ordered.
1 20mm Forstner bit
I Screwdriver
I Hammer
I Builder's square
I Flatpack unit
1 180-grit abrasive paper
I Woodworking adhesive
PRO TIP
WORK WITH THE
MANUFACTURER'S
MARKINGS AND
STRAIGHT EDGES
AS MUCH AS
POSSIBLE
1 Measure the space and subtract the
thickness of the vertical side pieces
(gables) for the final cut width of all
2 Use a combination square to transfer
the cut line along all horizontal pieces,
3 Clamp a straight edge (we used a length
of pine) to trim with a circular saw, keeping
including the top, base, shelves,
kickboard and any infills. Tip: Only
the offcuts. Smooth away any breakout
with 180-grit abrasive paper. Tip: To
horizontal pieces. We reduced this
prevent the clamps from obstructing the
saw, and to keep the straight edge flat,
position the gables under it on either side,
moving them from the path of the blade.
standard 608mm unit to 520mm wide.
cut one side of each horizontal piece,
The gables are 17mm thick, so the final
working on the side that will be least
width of the horizontals is 486mm.
visible when the unit is installed.
Tip: Position two smaller pieces to allow
for the thickness of the gables and simply
mark the cut on the top or base piece.
5 Assemble the unit by joining the factory
edges of the top, base and shelf to the
4 Transfer the cam holes in the shelf by
6 Position the assembled unit on the
using the offcuts as templates and marking
backing to mark the excess, then cut
the centres with a combination square.
gable first. Before installing the screws in
the remaining gable, use a 3.5mm bit to
pre-drill through the existing holes and into
the corresponding top and base pieces.
Tip: Use a screwdriver to install cams and
with a circular saw or handsaw. Flip the
unit to be face down to reposition the
backing with the laminate side facing in,
Use a 20mm Forstner bit to drill in stages,
checking the depth to avoid going right
through. Test the cams fit flush and flat.
Tip: If you don't have a Forstner bit, drill
right through the cam pin holes in the
securing with adhesive and the supplied
nails. Tip: Always reinforce flatpack joins
with a bead of adhesive along the raw
edges before securing.
cam pins, and a drill for screws.
gable to secure the shelf from the outside
with 40mm screws.
80 bunnings.com.au |O bunnings | O bunnings


