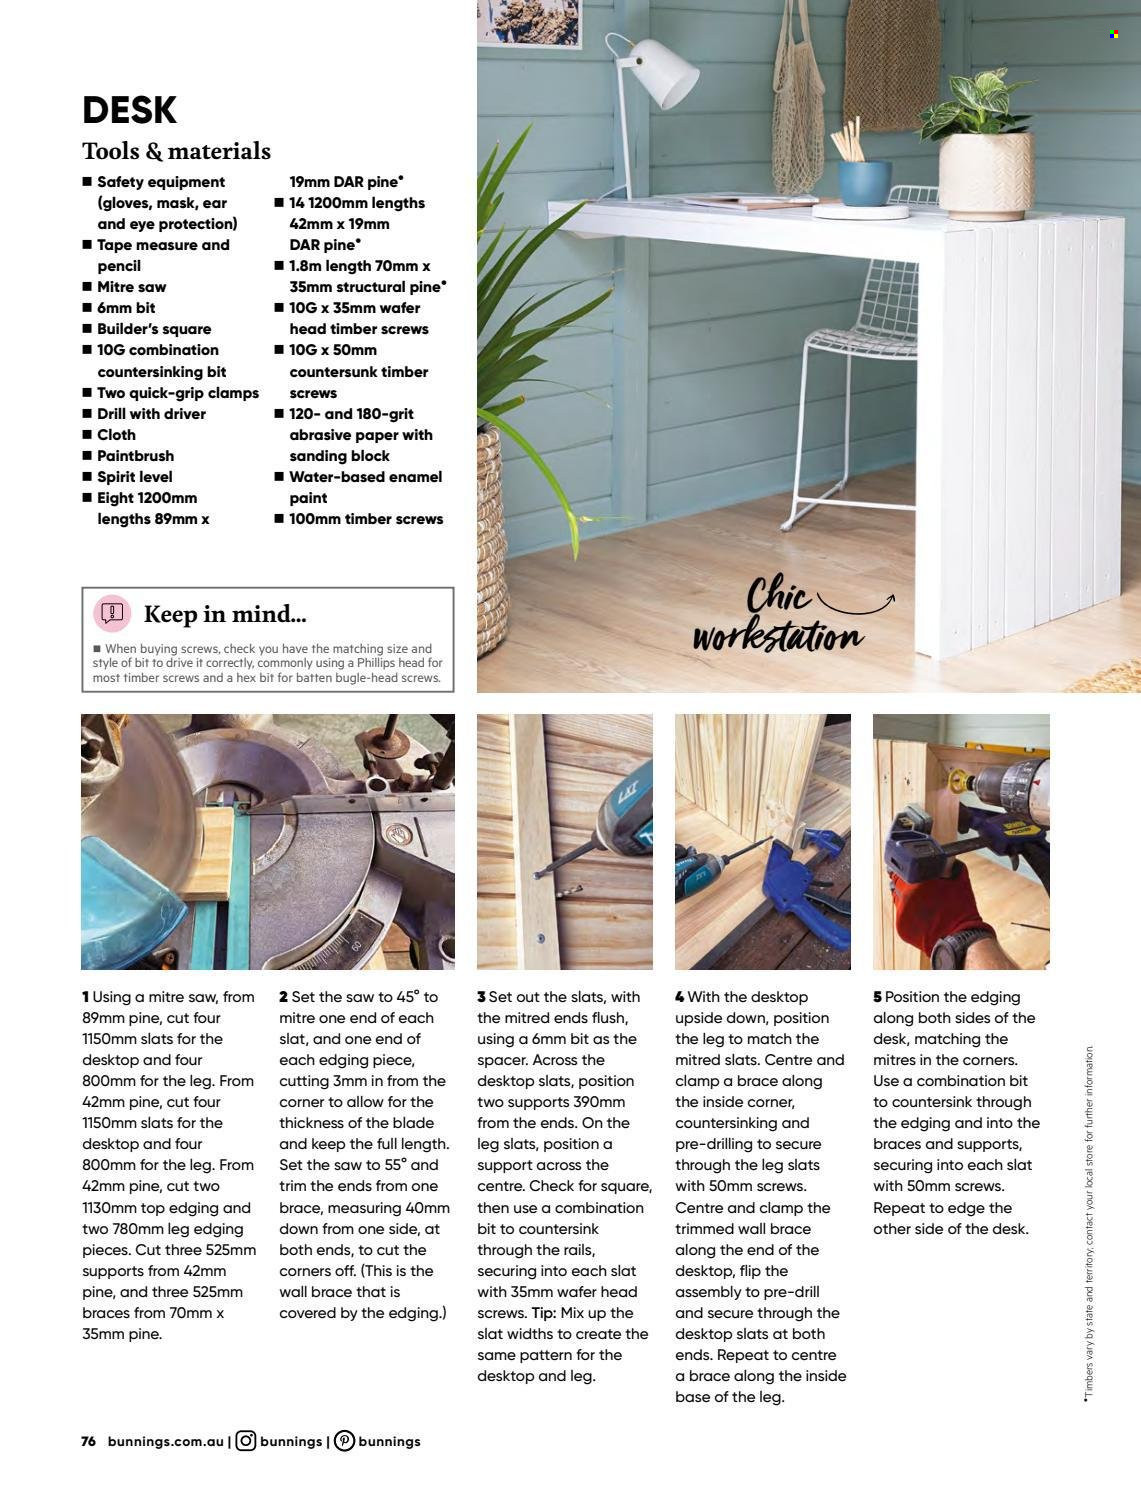
DESK
Tools & materials
1 Safety equipment
(gloves, mask, ear
and eye protection)
I Tape measure and
19mm DAR pine
1 14 1200mm lengths
42mm x 19mm
DAR pine
1 1.8m length 70mm x
35mm structural pine
1 10G x 35mm wafer
pencil
I Mitre saw
1 6mm bit
I Builder's square
1 10G combination
head timber screws
1 10G x 50mm
countersinking bit
I Two quick-grip clamps
I Drill with driver
I Cloth
countersunk timber
screws
1 120- and 180-grit
abrasive paper with
sanding block
I Water-based enamel
I Paintbrush
1 Spirit level
I Eight 1200mm
lengths 89mm x
paint
1 100mm timber screws
Chic
Workestation
O Keep in mind...
I When buying screws, check you have the matching size and
style of bit to drive it correctly, commonly using a Phillips head for
most timber screws and a hex bit for batten bugle-head screws.
3 Set out the slats, with
5 Position the edging
1 Using a mitre saw, from
89mm pine, cut four
2 Set the saw to 45° to
4 With the desktop
upside down, position
the leg to match the
mitred slats. Centre and
mitre one end of each
the mitred ends flush,
along both sides of the
1150mm slats for the
slat, and one end of
using a 6mm bit as the
desk, matching the
desktop and four
800mm for the leg. From
42mm pine, cut four
1150mm slats for the
spacer. Across the
desktop slats, position
two supports 390mm
from the ends. On the
mitres in the corners.
each edging piece,
cutting 3mm in from the
clamp a brace along
the inside corner,
Use a combination bit
corner to allow for the
to countersink through
thickness of the blade
countersinking and
pre-drilling to secure
through the leg slats
with 50mm screws.
the edging and into the
braces and supports,
desktop and four
800mm for the leg. From
42mm pine, cut two
and keep the full length.
leg slats, position a
Set the saw to 55° and
support across the
centre. Check for square,
securing into each slat
trim the ends from one
with 50mm screws.
Centre and clamp the
1130mm top edging and
two 780mm leg edging
brace, measuring 40mm
then use a combination
Repeat to edge the
down from one side, at
bit to countersink
trimmed wall brace
other side of the desk.
both ends, to cut the
along the end of the
desktop, flip the
assembly to pre-drill
and secure through the
desktop slats at both
ends. Repeat to centre
a brace along the inside
pieces. Cut three 525mm
through the rails,
supports from 42mm
pine, and three 525mm
braces from 70mm x
corners off. (This is the
securing into each slat
wall brace that is
with 35mm wafer head
covered by the edging.)
screws. Tip: Mix up the
slat widths to create the
35mm pine.
same pattern for the
desktop and leg.
base of the leg.
76 bunnings.com.au |O bunnings |O bunnings
*Timbers vary by state and territory, contact your local store for further information